Designing and building an exhibition stand in Dubai follows seven stages: set objectives, brief a designer, develop 3D concepts, plan the layout, choose materials, secure organiser and venue approvals, then fabricate, install, run and dismantle the stand. Done well, the process takes 10 to 16 weeks for a custom stand. Most failures come from decisions made too late, not from poor design. This guide walks through each stage and the decision tree we follow at Celestine, so first-time exhibitors and planners can make the right call at each step.
Understanding Your Exhibition Objectives & Audience

Every good stand starts with a measurable goal, not a design mood board. Before anyone sketches a layout, you need to know what the stand must achieve, who it must attract and how you will judge the result.
What objectives should an exhibition stand serve?
Most stands serve one primary and one secondary objective. Typical primary objectives are:
- Lead generation: capturing qualified contacts for the sales team.
- Product launch or demonstration: letting visitors see, touch or test something new.
- Brand visibility: building recognition in a new market, such as a regional entry into the GCC.
- Relationship management: meeting existing distributors, partners and buyers.
- Deal closing: hosting scheduled meetings with pre-qualified prospects.
The objective changes the stand’s shape. A lead-generation stand needs open frontage, a strong hook and fast conversations. A relationship stand needs enclosed meeting rooms and hospitality. Trying to serve all five equally produces a stand that does none of them well. This is the first thing most generic advice gets wrong: it treats the stand as a billboard when it is really a working room.
How well do you know your visitors?
Dubai exhibitions draw a highly international audience: buyers from the GCC, South Asia, Africa, Europe and beyond. Review the organiser’s visitor profile, including job titles, countries, sectors and buying authority. Then write down three visitor types you want to attract and what each should do on your stand. A procurement director from Riyadh and a start-up founder from Mumbai want different things from the same 36 square metres.
Dubai’s multicultural audience also affects practical details: bilingual graphics (English and Arabic where relevant), prayer-time awareness in the staffing schedule, and hospitality that respects dietary requirements. These are small choices that signal professionalism.
The Exhibition Stand Design Process: Step-by-Step Decision Tree
The complete process from brief to installation can be organised as what we call the Five-Gate Stand Framework. Each gate is a decision point. You do not move to the next until the current one is signed off, because changes made after a gate cost far more than changes made before it.
Gate 1: Objectives and constraints
Confirm goals, target audience, stand size, venue, show dates and a budget range. Identify the fixed constraints early: hall height limits, floor loading, stand position (island, corner, linear or peninsula) and the organiser’s deadlines.
Gate 2: Concept and 3D design
The designer turns the brief into a concept. Modern 3D exhibition stand design in Dubai means walk-through renders, not just a front elevation, so you can judge sightlines, traffic flow and how the stand looks from the aisle at 10 metres, which is where most visitors decide whether to walk in. Expect two or three rounds of revision.
Gate 3: Technical development and approvals
Once the concept is approved, the team produces technical drawings, structural details, electrical plans and material specifications. These go to the organiser or venue for approval. This is where compliance is won or lost (see the regulations section below).
Gate 4: Budget lock and fabrication
You approve the final itemised quote. Fabrication starts in the workshop: structural framing, joinery, printing, lighting and AV integration. A reputable builder will pre-assemble the stand in the workshop so problems are found before the stand reaches the hall.
Gate 5: Install, operate, measure and dismantle
Installation happens inside the organiser’s build-up window, often only a few days. During the show, the stand is operated against the objectives set in Gate 1. Afterwards, the dismantle and the post-show review close the loop: what worked, what to reuse, what to change.
A realistic timeline
- 12 to 16 weeks out: brief, objectives, designer selection.
- 10 to 12 weeks out: concept and 3D visuals approved.
- 8 to 10 weeks out: technical drawings submitted for organiser approval.
- 4 to 8 weeks out: fabrication and graphics production.
- 1 to 2 weeks out: workshop pre-build, logistics, staff briefing.
- Build-up days: on-site installation and final checks.
Compressed projects of six weeks or fewer are possible, usually with modular systems, but they leave little room for revision. For a wider view of how the stand fits into the whole show, see our guide to exhibition booth design and trade show success in Dubai.
Booth Layout & Spatial Planning: Creating Functional Zones
Good exhibition space planning and layout divides the stand into zones that match what visitors actually do. Layout is about behaviour: how people approach, pause, engage and leave.
What zones does an exhibition stand need?
- Attraction zone (frontage): the first 2 metres from the aisle. It carries the headline message, a hero product, a screen or a live activity. Keep it open and uncluttered.
- Engagement zone: demo counters, interactive displays or product plinths where staff start conversations.
- Conversation zone: seating and tables for longer discussions, ideally set back from the main aisle to reduce noise.
- Private meeting zone: an enclosed or semi-enclosed room for negotiations and confidential discussions.
- Back-of-house: storage for brochures, samples and personal items, plus a refreshment point and a staff rest area.
How much space goes to each zone?
There is no universal ratio, but a useful rule of thumb is to keep 50 to 60 percent of the floor area open and reserve the rest for structures, furniture and storage. Crowded stands feel smaller and intimidate walk-up visitors. On a 36 sqm stand, a 6 sqm meeting room and a 3 sqm storage area are usually sufficient, leaving the rest for display and circulation.
Layout rules that hold up in practice
- Design for the corner or island: open sides increase footfall. If you have two or more open sides, avoid building walls along them.
- Keep sightlines clean: visitors should see your brand name and offer from at least 10 metres. Tall elements such as hanging signs or towers help in large halls.
- Allow circulation: aisles inside the stand should be at least 1 to 1.2 metres wide so groups can move without queuing.
- Place demos at the edge, not the centre: activity draws crowds, and crowds should form where they are visible but do not block the entrance.
- Light for emphasis: exhibition halls are bright and flat. Use accent lighting on products and brand elements to create contrast.
For tactical detail, including traffic-flow patterns and visitor psychology, our cluster article on maximizing your trade show booth through layout and design tactics goes deeper. Venue differences matter too. Hall configurations, column positions and entrances vary across the UAE’s exhibition facilities, which our venue guides cover.
Material Selection & Construction Methods for Dubai Stands
Material choice affects cost, weight, build time, fire compliance, durability and sustainability. The right answer depends on whether the stand will be used once or many times.
What materials are best for exhibition stands in Dubai?
Dubai halls are fully air-conditioned, so the climate affects the stand mainly through transport, storage and humidity, and through outdoor or semi-outdoor events. Commonly used exhibition stand materials and finishes include:
- Fire-rated MDF and plywood: the workhorse of custom builds. Easy to shape, paint and laminate. Specify fire-retardant grades.
- Aluminium extrusion systems: light, strong and reusable. Ideal for modular exhibition stands and for rapid assembly.
- Tensioned fabric (SEG frames): excellent for large graphic surfaces, lightweight to ship and easy to replace.
- Tempered or laminated glass: premium look for display cases and meeting-room walls. Needs safety-rated specification.
- Acrylic and solid-surface materials: for counters, logos and illuminated elements.
- Timber veneer and real wood: a warm, high-end feel, though heavier and more costly.
- LED lighting and screens: low heat output, efficient and flexible. Increasingly central to the design rather than an add-on.
Custom or modular: which should you choose?
Custom exhibition stand construction offers full freedom over shape, scale and brand expression. It suits flagship shows, large footprints and product launches. Modular exhibition stands use reusable components that can be reconfigured for different sizes and venues. They suit brands exhibiting multiple times a year, and they reduce cost per show over time.
A hybrid approach often works best: a reusable modular structure with custom-built hero elements such as a reception desk, feature wall or demo plinth. This lets you refresh the look each show without rebuilding everything.
How do you make a stand more sustainable?
Sustainable exhibition stand design is moving from a nice-to-have to a procurement question, especially for corporate and government exhibitors. Practical steps include:
- Design for reuse: modular frames and interchangeable graphic panels.
- Use responsibly sourced timber (FSC-certified where available) and avoid single-use foam and PVC where alternatives exist.
- Choose LED lighting to reduce power demand.
- Print graphics on recyclable or fabric substrates that can be re-used.
- Plan the dismantle: label components and agree storage or recycling routes in advance.
Build quality is the hidden variable here. A well-built stand lasts longer, looks sharper under hall lighting and avoids last-minute repairs. We cover this in detail in our piece on why expo stall build quality decides your visibility, leads and ROI.
Navigating Dubai Exhibition Regulations & Compliance
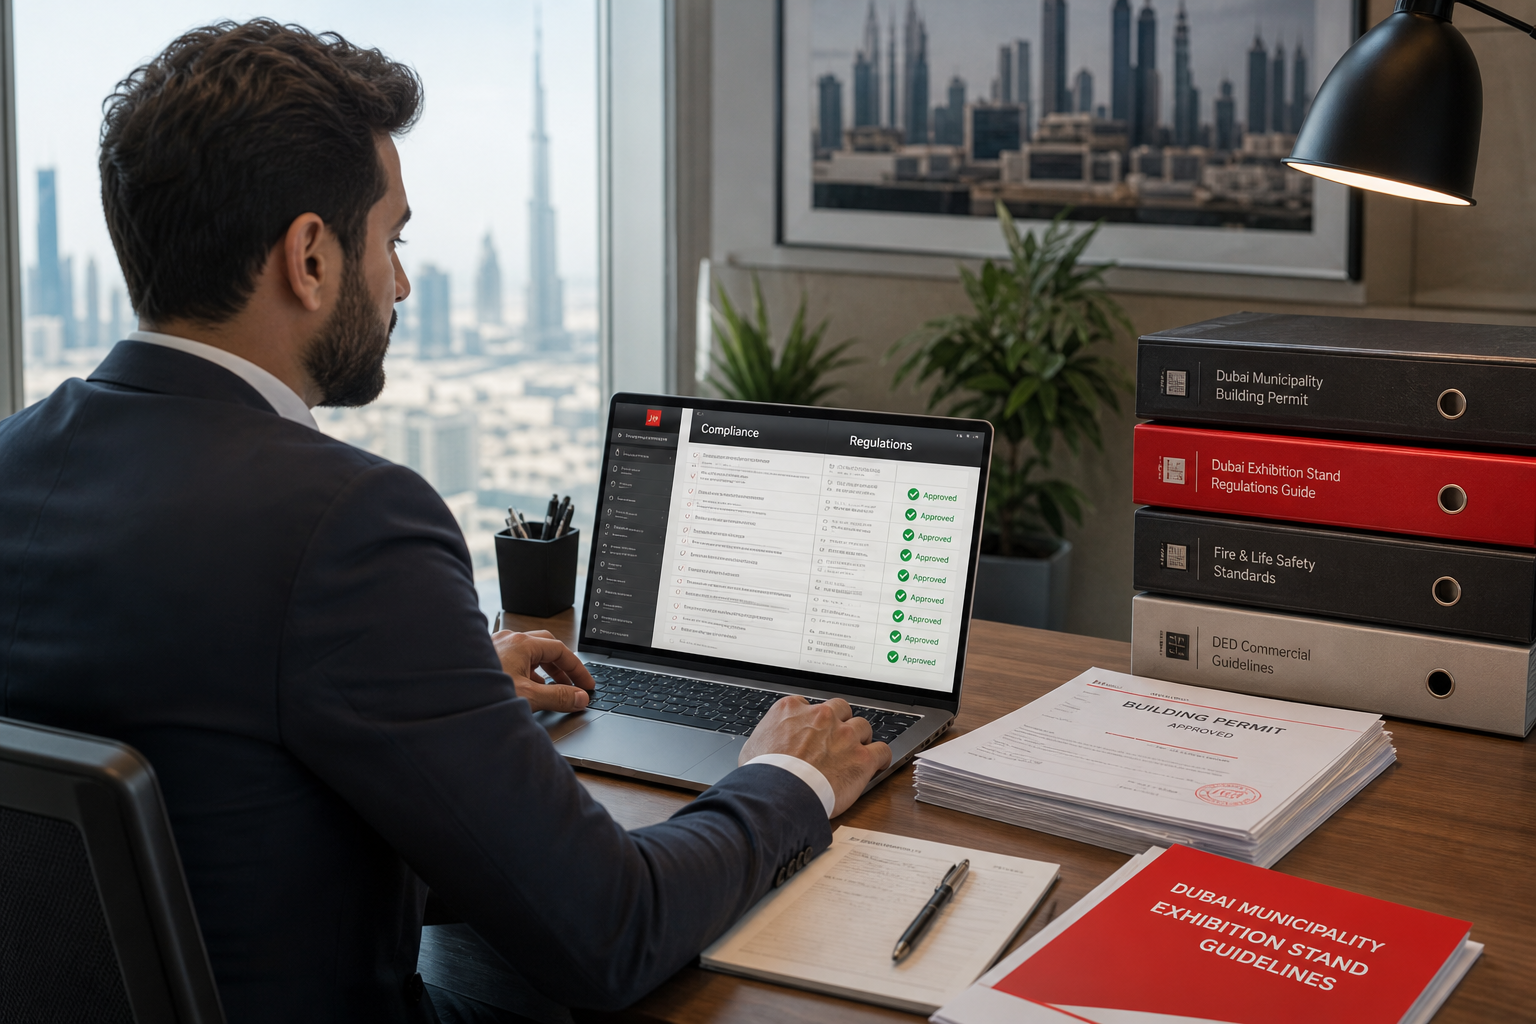
Trade show stand regulations in the UAE are set mainly by the venue and the show organiser, backed by local authority requirements on fire, safety and electrical standards. Rules differ by venue and by event, so the organiser’s exhibitor manual is always the final authority. Treat what follows as a checklist of what to look for, not a substitute for reading the manual.
What are the key compliance requirements?
- Approved or registered contractors: many venues, including major Dubai halls, require stand builders to be registered or approved with the organiser or venue. Confirm this before you sign with a contractor.
- Design and drawing approval: custom stands typically need submitted plans, 3D visuals and structural details by a set deadline. Late submission can mean delayed build-up access or rejection.
- Height limits: maximum stand height is set per hall and per event. Double-deck or very tall structures need extra engineering sign-off.
- Fire safety: materials generally need to meet fire-retardant requirements, and exits, extinguishers and signage must follow civil defence rules. Keep material certificates on file for inspection.
- Electrical compliance: power loads, distribution boards and cabling must meet venue standards. Power is usually ordered through the venue or organiser, and ordering late can mean higher fees or no supply.
- Structural safety: hanging signs, rigging points and heavy structures require load calculations and certified fixing methods. Rigging is typically handled by the venue’s approved providers.
- Build-up and dismantle windows: access times are strict, with penalties for overruns. Waste removal and floor protection requirements also apply.
- Content and licensing: music, branding and product claims may need permits. Alcohol and certain product categories have separate rules in the UAE.
How to stay compliant without slowing the project
Build compliance into the schedule, not the end of it. Ask for the exhibitor manual at Gate 1. Put the organiser’s submission deadlines in the project plan. Ask your builder to confirm in writing that materials and structures meet the stated requirements. In our experience, the stands that run into trouble at the venue are rarely those with bad design. They are the ones where nobody owned the paperwork.
Budget Planning & Cost Management for Stand Projects
How should you budget for an exhibition stand?
Start with the total exhibition budget, not just the stand build. Floor space is only one line, and many first-time exhibitors underestimate everything around it. A common rule of thumb is that the build and design cost lands in a similar range to the space rental, with services, travel, marketing and staffing on top. Treat that as a starting point and confirm it against real quotes.
An illustrative budget split for a custom stand project:
- Space rental: 25 to 35 percent
- Stand design and build: 30 to 40 percent
- Venue services (power, rigging, cleaning, internet): 5 to 10 percent
- Logistics and storage: 5 to 8 percent
- Staffing, travel and hospitality: 10 to 15 percent
- Pre-show and on-show marketing: 5 to 10 percent
- Contingency: 8 to 10 percent
What drives exhibition stand costs?
Four factors account for most of the variation between quotes. Size is the obvious one, but the others often matter more:
- Stand type: a modular system, a hybrid and a fully custom double-deck structure sit in very different price bands.
- Structural complexity: curved walls, large overhangs, suspended elements and heavy LED walls all add engineering, labour and rigging cost.
- Finish and materials: printed fabric, laminate and paint cost far less than stone effects, bespoke joinery or specialist glass.
- Schedule compression: a short build window means night shifts, more crew and air freight, and these costs are rarely visible in a first quote.
How can you reduce stand costs without weakening impact?
Spend on what visitors see from the aisle, and economise on what they do not. A strong fascia, clear branding at eye level, good lighting and one memorable focal point carry more weight than expensive finishes spread evenly across the stand. Reusable structural components, a modular core with custom graphics, and a design that can be reconfigured for a smaller space at the next show all lower the cost per exhibition over time. Cutting contingency is the one saving we advise against. Last-minute changes and venue charges happen on almost every project.
Exhibition Stand Design & Build: Complete Strategy Guide for Dubai
What is an exhibition stand strategy?
An exhibition stand strategy is a documented plan that links your commercial objectives to the stand’s layout, content, staffing and follow-up process. Design is one output of that plan, not the starting point. A stand without a strategy tends to look polished and perform poorly, because nobody agreed in advance what a successful visit should produce.
What is the Objective, Flow, Proof framework?
We use a three-part framework to keep Dubai stand projects focused. Each part answers one question, and each must be settled before the next.
- Objective: What specific result must this stand deliver? Examples include 150 qualified meetings, five distributor signings, or launch awareness among a defined buyer group. One primary objective is better than five equal ones.
- Flow: How will a visitor move from the aisle to a useful conversation? This covers sightlines, open versus closed edges, the position of the reception point, demo areas, meeting rooms and storage. Flow is where most layouts succeed or fail.
- Proof: How will you show the stand worked? Decide in advance which data you will capture, who captures it, and how it reaches sales. If you cannot define the proof, the objective is probably too vague.
Most advice starts at the render and works backwards. We find the reverse more reliable. When the objective is clear, many design decisions become straightforward.
How do you design a stand for a Dubai audience?
Dubai shows draw international and regional buyers, often from several cultures and languages in a single day. Practical consequences follow from that:
- Hospitality matters. Comfortable seating, a proper meeting space and refreshments that suit a diverse audience support longer, more useful conversations.
- Relationships carry commercial weight. Closed or semi-closed meeting areas help, because many deals are discussed privately and over more than one conversation.
- Multilingual content helps. Arabic alongside English on key messaging signals commitment to the market. Have it written or reviewed by a native speaker, not machine-translated.
- Climate and venue conditions are real. Strong air conditioning in large venues means lightweight graphics and loose materials need secure fixing.
- Cultural sensitivity applies to imagery and content. Check visuals, products on display and hospitality choices against local norms.
What is a realistic timeline for a custom stand?
For a custom build, plan from roughly 12 to 16 weeks before the show. Smaller or modular projects can move faster, but compressed schedules cost more and leave less room for approvals. An indicative sequence:
- 12 to 16 weeks out: confirm space, objectives and budget; brief designers.
- 10 to 12 weeks out: concept design, layout options and first cost estimate.
- 8 to 10 weeks out: design sign-off; technical drawings prepared for organiser submission.
- 6 to 8 weeks out: organiser approval, venue service orders and production start.
- 2 to 4 weeks out: graphics finalised, pre-build and quality check, logistics booked.
- Build window: installation, final checks, staff walkthrough.
- Show days and dismantle: operations, lead capture, removal and storage or recycling.
Should you choose a custom, modular or hybrid stand?
Choose based on how often you exhibit and how much brand expression you need. Custom stands give the most freedom and suit flagship shows and large spaces. Modular systems cost less per use and work well for a regular circuit of mid-size events. Hybrids combine a reusable structural core with custom graphics, counters and feature elements, and for many exhibitors they offer the best balance. The wrong choice is usually made on first-show price alone, without considering three-show or five-show cost.
Measuring ROI & Exhibition Success Metrics
How do you measure exhibition ROI?
Exhibition ROI is the net return from a show compared with its total cost, expressed as a percentage. The basic formula is:
ROI (%) = (Attributed revenue − Total exhibition cost) ÷ Total exhibition cost × 100
The difficulty is not the formula. It is attribution. B2B deals often close months after a show, so a fair measurement needs a window, typically six to twelve months, and a way to tag leads that came from the event in your CRM.
Which exhibition success metrics matter most?
Track a small set of metrics tied to your original objective:
- Qualified leads: contacts that meet defined criteria, not total badge scans.
- Cost per qualified lead: total cost divided by qualified leads.
- Meetings held versus meetings booked: shows how well pre-show outreach worked.
- Pipeline value created: the estimated value of opportunities opened within the show window.
- Conversion rate and revenue: leads converted to customers over your chosen period.
- Follow-up speed: time between the show and first sales contact. Leads decay quickly.
- Brand indicators: press mentions, social engagement and enquiries from outside the show, useful where awareness was the goal.
What do most ROI reports get wrong?
They count volume. A report showing 900 scans looks impressive, but if 60 became real conversations the number that matters is 60. The second common error is leaving out hidden costs such as staff time, travel and internal marketing, which flatters the result. The third is measuring too early. A show that appears weak at two weeks can look strong at six months. Agree the measurement method before the show, and share it with sales so the data is trusted.
How should stand design support measurement?
Good design makes data capture easy. Place scanning or registration points where conversations naturally begin, give staff a simple way to grade leads on the spot, and reserve a quiet area to log notes. Count footfall or dwell time if you want to test layout decisions. A stand that is hard to staff or hard to capture data on will undermine even a strong concept.
Common Pitfalls & How to Avoid Them
What are the most common exhibition stand mistakes?
Related reading: Exhibition Booth Design and Setup Tips for Dubai Trade Shows
Frequently asked questions
What is the complete process for designing and building an exhibition stand in Dubai?
The process follows five gates: objectives and constraints, concept and 3D design, technical development and approvals, budget lock and fabrication, then installation and measurement. Each gate is a decision point signed off before moving forward. A custom stand typically takes 10 to 16 weeks from brief to installation.
How do you plan booth layout and create effective visitor zones?
Divide the stand into five functional zones: attraction zone at frontage, engagement zone for demos, conversation zone for discussions, private meeting zone for negotiations, and back-of-house storage. Keep 50 to 60 percent of floor area open, maintain clear sightlines from 10 metres away, and ensure aisles are 1 to 1.2 metres wide for circulation.
What are the key regulations and compliance requirements for exhibition stands in Dubai?
Technical drawings, structural details, electrical plans and material specifications must be submitted to the organiser or venue for approval during Gate 3. Compliance requirements include hall height limits, floor loading restrictions, and stand position regulations. Early identification of constraints prevents costly late-stage changes.
How should you budget for an exhibition stand project and what drives costs?
Create an itemised quote covering structural framing, joinery, printing, lighting and AV integration. Budget lock occurs at Gate 4 before fabrication starts. Major cost drivers include stand size, materials, technical requirements, and timeline. Compressed projects under six weeks are possible with modular systems but leave minimal revision room.
What materials are best suited for exhibition stands in Dubai?
The article emphasises choosing materials during the design process, with technical specifications submitted for organiser approval. Decisions are made based on Dubai’s venue conditions, structural requirements and the stand’s functional needs, but specific material recommendations depend on individual project requirements and venue constraints.
How do you measure ROI and success from an exhibition stand investment?
ROI measurement begins in Gate 1 by setting measurable objectives such as lead generation, product demonstration, brand visibility, relationship management or deal closing. Post-show review evaluates what worked against these initial objectives, what to reuse and what to change for future exhibitions, closing the performance loop.